Working with attachments
Attachments can be added to the Event Log in Claims Manager to provide further information relating to the claim. As well as adding attachments directly to an event,
the Api also allows you to add attachments when creating an incident. This will automatically create an Event Log Entry when the incident is created with the attachments
linked. There are two methods for physically uploading the attachments to Claims Manager through the Api; by uploading the attachments in a POST request to
the /attachments endpoint, or by providing a url to a publicly accessible address that we can download the file from directly.
Attachments array
On both the /incidents and /events endpoints, the attachments array allows you to define one or more attachments to link to the incident or
event. Depending on whether you are uploading the attachments directly to the /attachments endpoint, or providing a url to the attachment you will need to fill out
either the attachmentId or url properties. The description property is an optional field to add a description to the uploaded document.
This will be displayed in the Claims Manager event along with the attachment if provided. See the Attachments Overview page for further information.
Uploading attachments via the Api
Let's walk through how we can add attachments by uploading them first via the /attachments endpoint, and then linking them to a new event that we will create. Let's
assume we have two files file1.jpg and file2.jpg sitting in the path C:\Attachments on our local machine and we want to create a new Event Log Entry with
these attachments linked.
Before we can create the event, we first need to upload these attachments and retrieve the generated attachmentId for each one so we can use this when generating our
event create request. The below example shows the call we make to the /attachments endpoint to upload these two attachments:
curl --location --request POST 'https://api.claimsmanagertest.crawco.co.uk/attachments' \
--header 'Authorization: Bearer {access token}' \
--form '=@"/C:/Attachments/file1.jpg"' \
--form '=@"/C:/Attachments/file2.jpg"'
The response from this endpoint provides us with both attachmentIds which we will need:
[
{
"filename": "file1.jpg",
"attachmentId": "ee0ee1de-0d6c-4d8b-aa24-fc1e466afadd"
},
{
"filename": "file2.jpg",
"attachmentId": "af5bc47d-5aa2-42dc-b8b6-7d2362396e31"
}
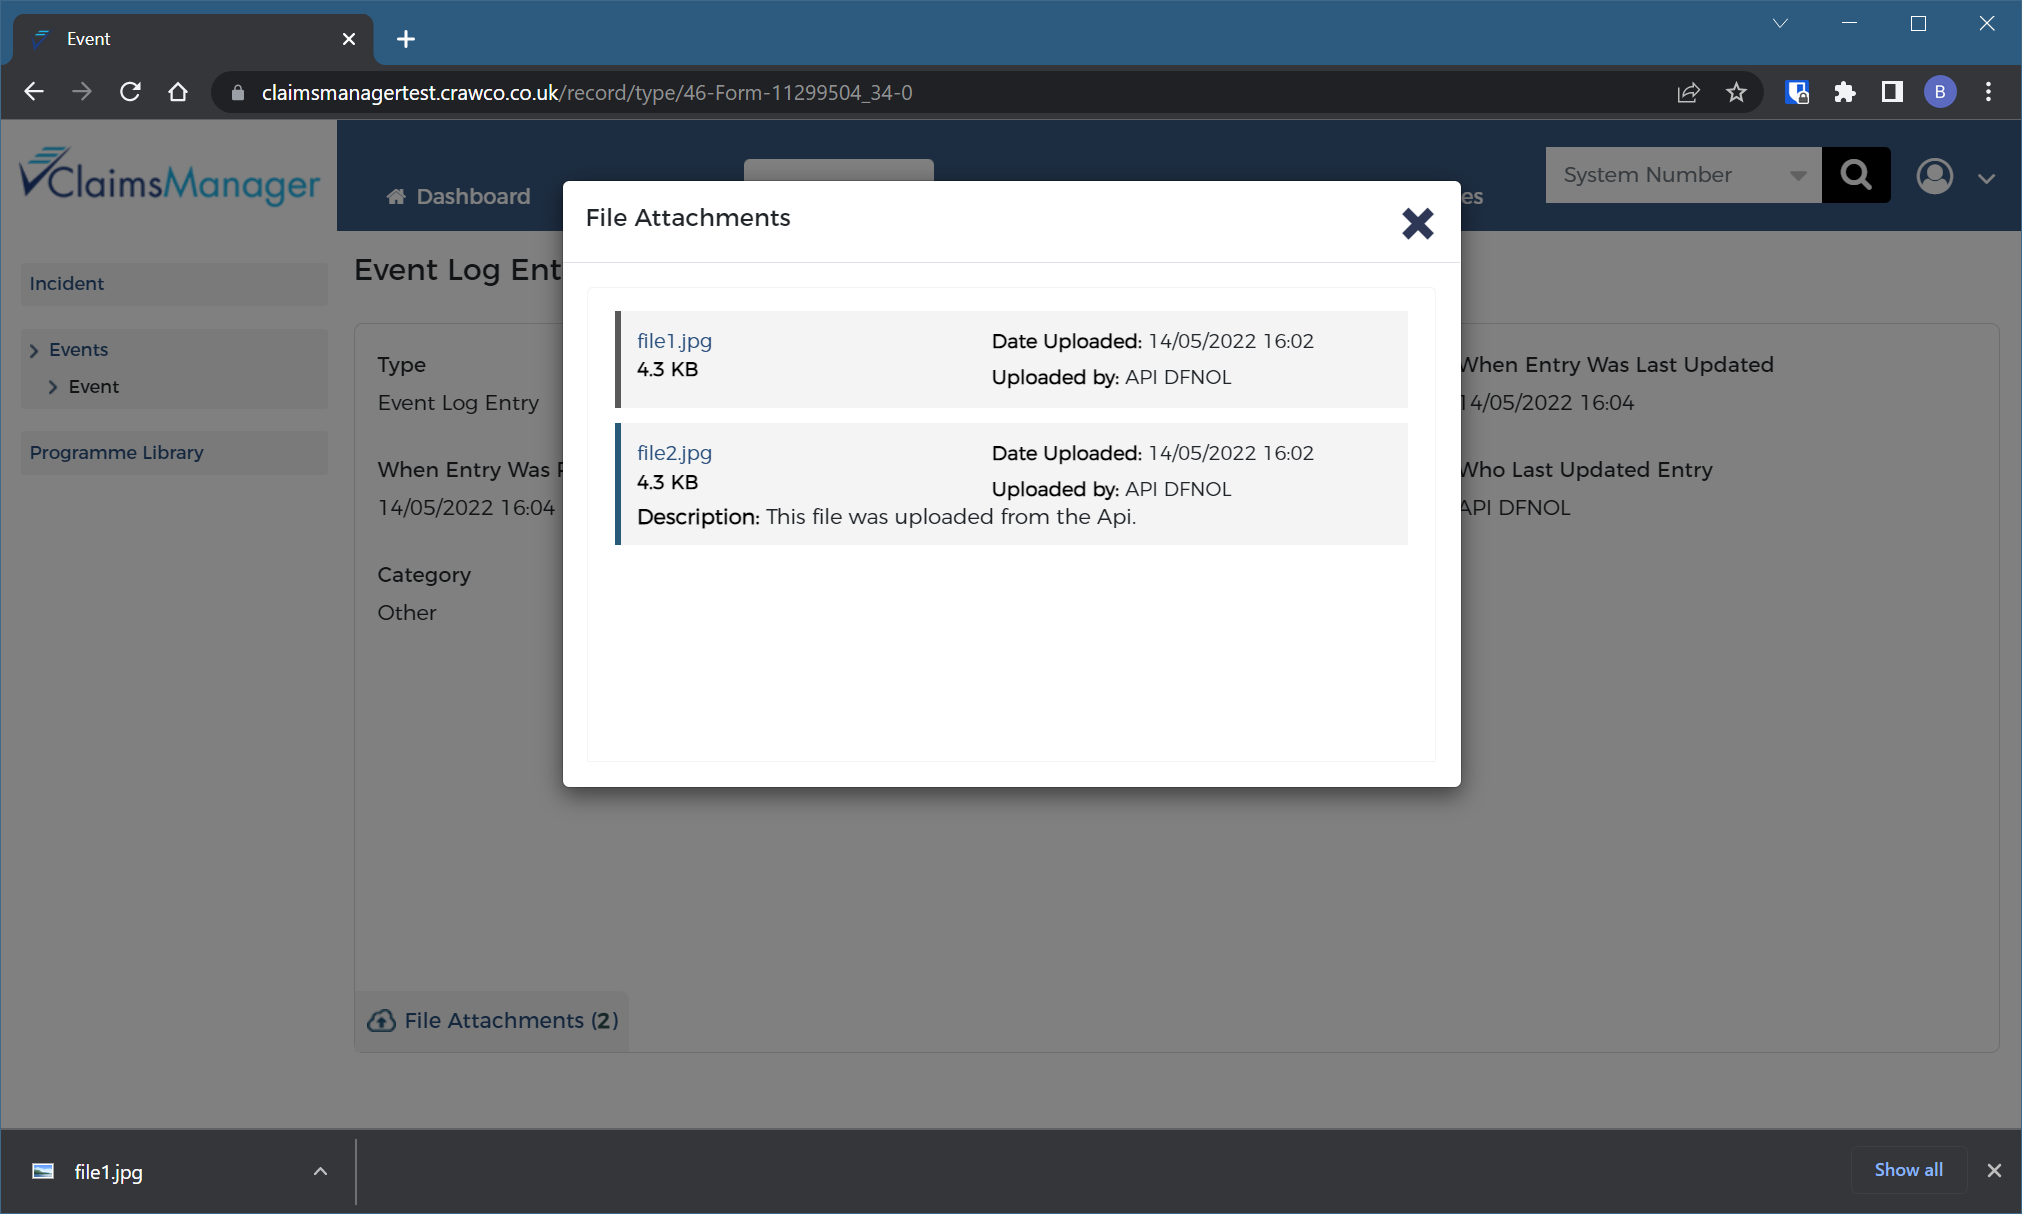
]Now we can construct our request to create the event and link these two attachments to it. For the file2.jpg attachment, we'll add a description to see how this appears in the front end of Claims Manager.
curl --location --request POST 'https://api.claimsmanagertest.crawco.co.uk/incidents/6597925/Events' \
--header 'Authorization: Bearer {access token}' \
--header 'Content-Type: application/json' \
--data-raw '{
"eventType": "Event Log Entry",
"category": "Other",
"detail": "Test Event Log Entry",
"attachments": [
{
"attachmentId": "ee0ee1de-0d6c-4d8b-aa24-fc1e466afadd"
},
{
"attachmentId": "af5bc47d-5aa2-42dc-b8b6-7d2362396e31",
"description": "This file was uploaded from the Api."
}
]
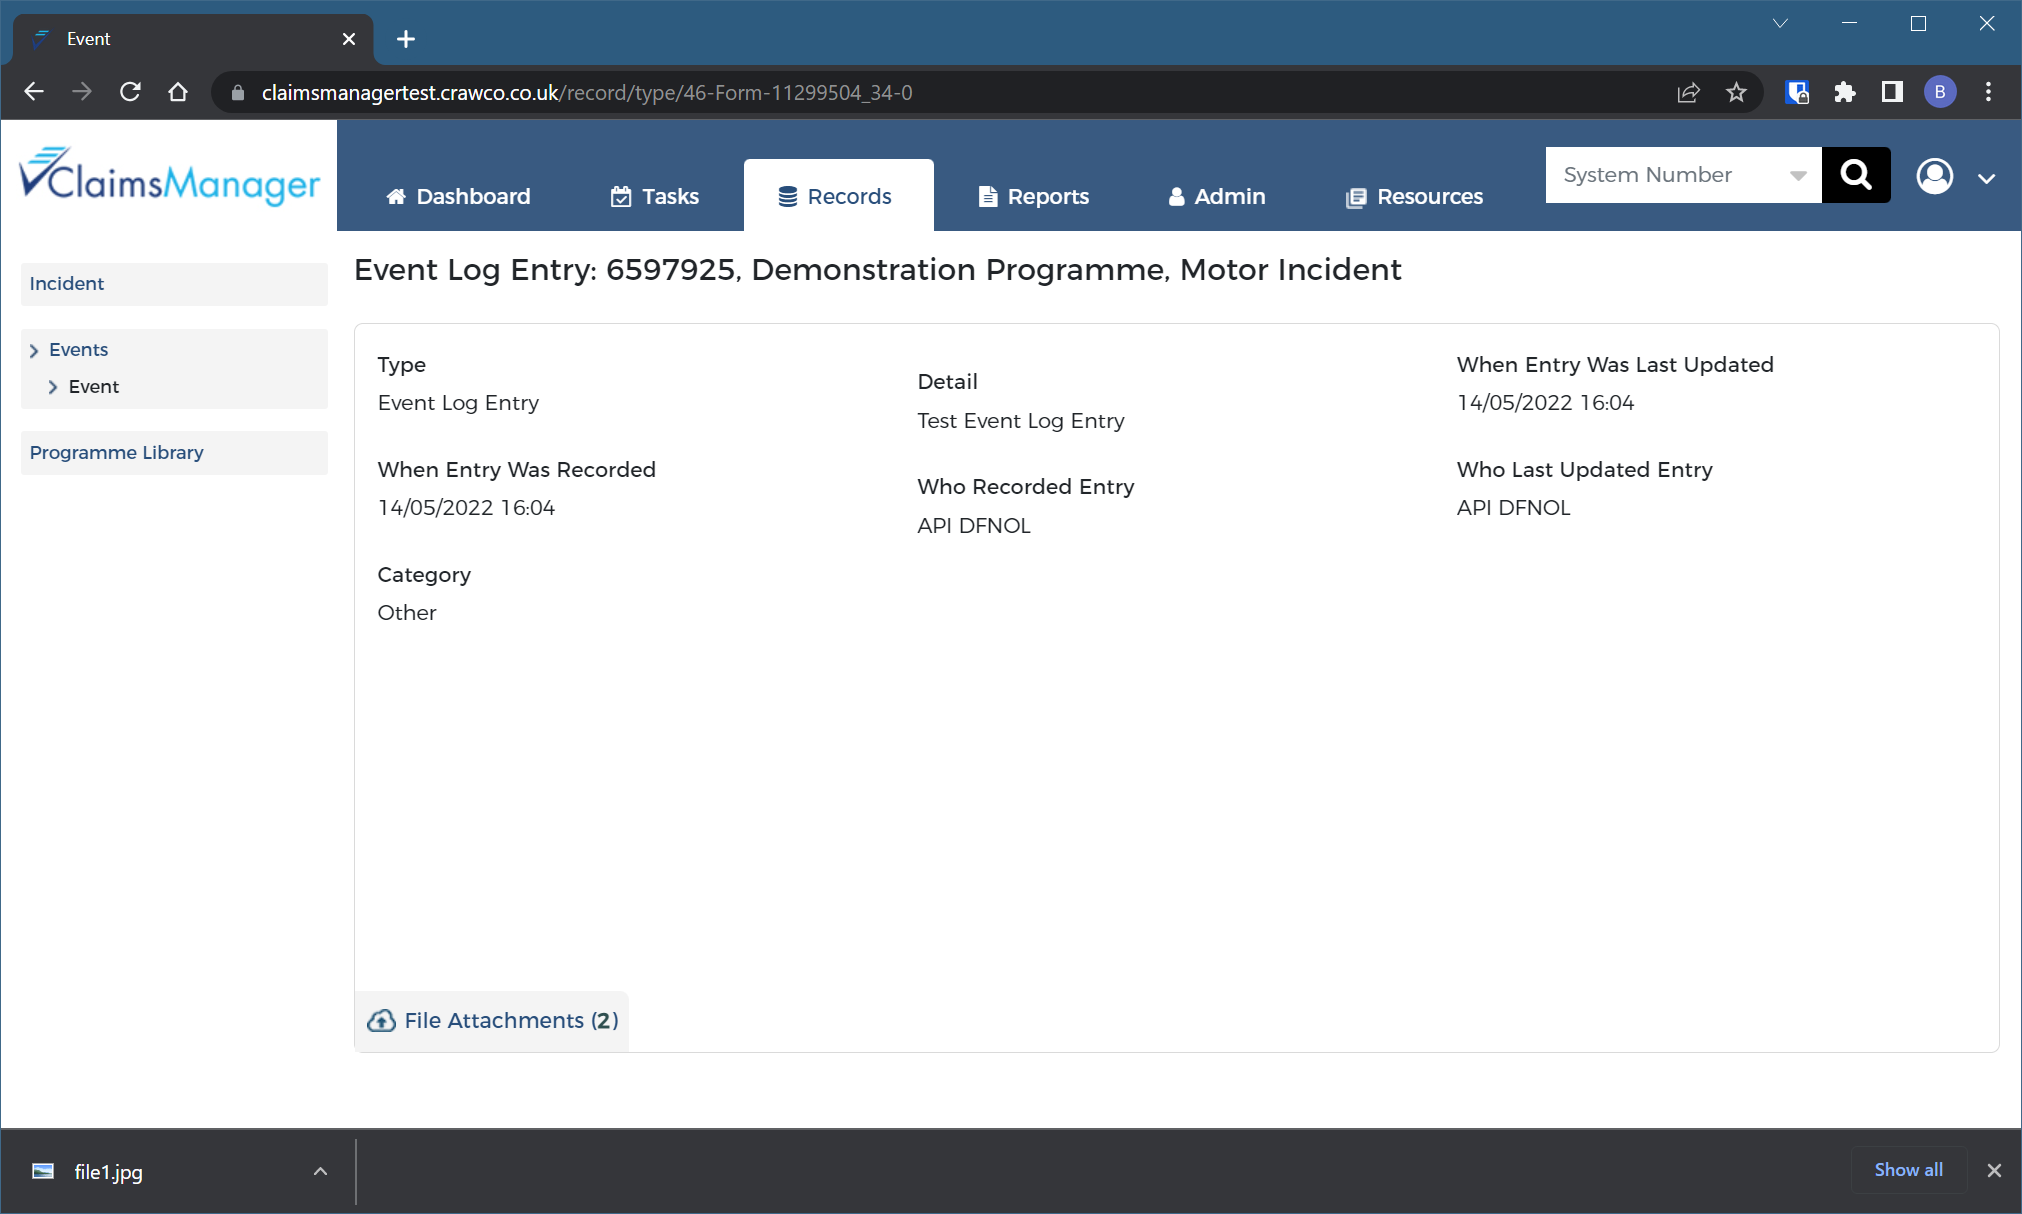
}'Now if we head over to Claims Manager and look at the Event Log for the incident, we can see the newly created event along with both attachments:
Passing a url
If we want to use the url method instead, then we can omit the first step above entirely and skip straight to crafting our request message for creating the event.
This time, instead of passing in an attachmentId, we will provide a publicly accessible url instead which indicates that the file is available
to download at this address:
curl --location --request POST 'https://api.claimsmanagertest.crawco.co.uk/incidents/6597925/Events' \
--header 'Authorization: Bearer {access token}' \
--header 'Content-Type: application/json' \
--data-raw '{
  "eventType": "Event Log Entry",
  "category": "Other",
  "detail": "Test Event Log Entry",
  "attachments": [
	{
		"url": "https://www.example.com/file1.jpg"
	},
	{
		"url": "https://www.example.com/file2.jpg",
		"description": "This file was uploaded from the Api."
	}
  ]
}'
So long as the url provided was publicly accessible then the event will be created with the attachments linked as before. The url provided can be a temporary
link, the attempt to download the file will be immediate, but no authentication or additional headers can be accomodated. The file should be retrievable via a simple GET
request.
There is some additional overhead on the POST request using this method. While the attachments are downloaded asynchronously from the main request, an initial
check must be performed to ensure that the file(s) is retrievable and conforms to the restrictions set out on the Attachments Overview
page.